In this article, we will learn about the Spring Boot Actuator and will create a project in which we implement the Spring Boot Actuator. The actuator is a part of the Spring Boot Framework, which is used for managing and monitoring applications.
The actuator provides a detailed report of application that contains the total count of API used, how many of them are not working, total numbers of bean present in Spring Boot Application, information about the database state, and many more.
It contains many HTTP endpoints or JMX beans which used to monitor every activity of the application and by default, all the endpoints are secured, so no need to worried about the security issue.
Important Features of Spring Boot Actuator
- HTTP Endpoints
- Metrics
- Audit
HTTP EndPoints: Actuator contains many inbuild endpoints such as /health which provides the health detail of the application. Endpoints help us interact and monitor the application.
Metrics: It provides information about how much memory used, free memory, about classes, threads count, etc.
Audit: It provides information about authentication such as authentication success,” “failure,” and “access denied” exceptions.
Enabling the Spring Boot Actuator in Application
To enable this feature you need to add the following dependency in our build configuration file that is pom.xml.
<dependency>
   <groupId>org.springframework.boot</groupId>
   <artifactId>spring-boot-starter-actuator</artifactId>
</dependency>
application.properties file configuration to enable the actuator
management.security.enabled = false
management.port = 8090management.security.enabled: This will disable the security for actuator endpoints.
management.port: With property, you can access the Actuator endpoints on different port numbers. Suppose your application is running on port 8080. But for accessing the Actuator endpoint you are using the port 8090.
Let’s build the Application and enable the Actuator
Step 1: Create a maven project from Spring Initializr.
Step 2: Enter the group name. For me com.pixeltrice
Step 3: Add the artifact Id. I am putting spring-boot-actuator-app.
Step 4: Add the dependencies such as Spring Web, and Spring Boot Starter Actuator.
Step 5: Click on the Generate button. Once you clicked project will be created in the jar file format. Extract the jar file and put the project folder in some path. I placed on path C:\Users\1302143\Downloads\spring-boot-actuator-app.
Step 6: Import the file on your IDE such as Eclipse.
Select File -> Import -> Existing Maven Projects -> Browse -> Select the folder spring-boot-actuator-app-> Finish.
Once you import the project folders will look as shown below.

Step 7: Add the following properties in application.properties file.
management.security.enabled = false
management.port = 8090
Step 8: In this step we will create a Rest controller class.
package com.pixeltrice.springbootactuatorapp;

import org.springframework.web.bind.annotation.GetMapping;
import org.springframework.web.bind.annotation.RestController;

@RestController
public class ActuatorController {

	@GetMapping("/welcome")
	public String hello()
	{
	return "Hello welcome to Spring Actuator!";
	}

}
Note: Make sure that pom.xml file should have following dependencies.
<?xml version="1.0" encoding="UTF-8"?>
<project xmlns="http://maven.apache.org/POM/4.0.0" xmlns:xsi="http://www.w3.org/2001/XMLSchema-instance"
	xsi:schemaLocation="http://maven.apache.org/POM/4.0.0 https://maven.apache.org/xsd/maven-4.0.0.xsd">
	<modelVersion>4.0.0</modelVersion>
	<parent>
		<groupId>org.springframework.boot</groupId>
		<artifactId>spring-boot-starter-parent</artifactId>
		<version>2.3.2.RELEASE</version>
		<relativePath/> <!-- lookup parent from repository -->
	</parent>
	<groupId>com.pixeltrice</groupId>
	<artifactId>spring-boot-actuator-app</artifactId>
	<version>0.0.1-SNAPSHOT</version>
	<name>spring-boot-actuator-app</name>
	<description>Demo project for Spring Boot</description>

	<properties>
		<java.version>11</java.version>
	</properties>

	<dependencies>
		<dependency>
			<groupId>org.springframework.boot</groupId>
			<artifactId>spring-boot-starter-actuator</artifactId>
		</dependency>
		<dependency>
			<groupId>org.springframework.boot</groupId>
			<artifactId>spring-boot-starter-web</artifactId>
		</dependency>
		<dependency>
			<groupId>org.springframework.boot</groupId>
			<artifactId>spring-boot-starter-test</artifactId>
			<scope>test</scope>
			<exclusions>
				<exclusion>
					<groupId>org.junit.vintage</groupId>
					<artifactId>junit-vintage-engine</artifactId>
				</exclusion>
			</exclusions>
		</dependency>
	</dependencies>

	<build>
		<plugins>
			<plugin>
				<groupId>org.springframework.boot</groupId>
				<artifactId>spring-boot-maven-plugin</artifactId>
			</plugin>
		</plugins>
	</build>

</project>
Step 9: Run your Spring Boot Application.
Step 10: Now go to your browser and hit the following URL http://localhost:8080/actuator. You will get the response as shown below.
{"_links":{"self":{"href":"http://localhost:8080/actuator","templated":false},"health-path":{"href":"http://localhost:8080/actuator/health/{*path}","templated":true},
"health":{"href":"http://localhost:8080/actuator/health","templated":false},"info":{"href":"http://localhost:8080/actuator/info","templated":false}}}
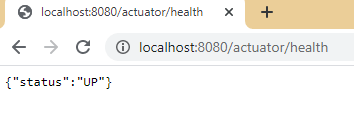
Step 11: Check the health of your application. Hit the following URL in Your browser http://localhost:8080/actuator/health. You will get the screen as shown.

Note: Like Step 11, you can hit different HTTP Endpoints of Actuator.
Source Code: Github Link.
Summary
In this article, we learned about how to add the actuator in application and monitor or manage our application using the Actuator Endpoints. If you have any doubt or confusion please feel free to ask, I will love to answer your queries.