In this article, we will learn step by step to send emails using Spring Boot Application. In our Restful web service application, we will implement the feature of sending an email with Gmail SMTP Server.
What is SMTP Server?
The acronym of SMTP is the Simple Mail Transfer Protocol. Whenever we send a mail to another person’s email id, then there is some protocol through which our email goes through before delivering to the mentioned email id.
That protocol is the SMTP server which acts as an intermediate between your email id and the person email id whom you send the email. You can consider an SMTP as real-life Postman, who takes the letter from one place and delivered to the address which is mentioned in that letter.
Note : In this article I am using Gmail SMTP for sending the mail.
Following are the steps required for sending the email via Gmail SMTP.
Step 1: Create a simple Spring boot maven project from Spring Initialzr and import it in the IDE such as Eclipse or IntelliJ. If you don’t know how to create please follow this article before processing further Build the first Application with Spring Boot.
Step 2: Add the Spring Boot Starter Mail dependency in your pom.xml file.
<dependency>
   <groupId>org.springframework.boot</groupId>
   <artifactId>spring-boot-starter-mail</artifactId>
</dependency>
So the final pom.xml file must have following dependencies.
<?xml version="1.0" encoding="UTF-8"?>
<project xmlns="http://maven.apache.org/POM/4.0.0" xmlns:xsi="http://www.w3.org/2001/XMLSchema-instance"
	xsi:schemaLocation="http://maven.apache.org/POM/4.0.0 https://maven.apache.org/xsd/maven-4.0.0.xsd">
	<modelVersion>4.0.0</modelVersion>
	<parent>
		<groupId>org.springframework.boot</groupId>
		<artifactId>spring-boot-starter-parent</artifactId>
		<version>2.3.2.RELEASE</version>
		<relativePath/> <!-- lookup parent from repository -->
	</parent>
	<groupId>com.pixeltrice</groupId>
	<artifactId>SendingEmail</artifactId>
	<version>0.0.1-SNAPSHOT</version>
	<name>SendingEmail</name>
	<description>Demo project for Spring Boot</description>

	<properties>
		<java.version>11</java.version>
	</properties>

	<dependencies>
		<dependency>
			<groupId>org.springframework.boot</groupId>
			<artifactId>spring-boot-starter-web</artifactId>
		</dependency>

		<!-- send email -->
        <dependency>
            <groupId>org.springframework.boot</groupId>
            <artifactId>spring-boot-starter-mail</artifactId>
        </dependency>

		<dependency>
			<groupId>org.springframework.boot</groupId>
			<artifactId>spring-boot-starter-test</artifactId>
			<scope>test</scope>
			<exclusions>
				<exclusion>
					<groupId>org.junit.vintage</groupId>
					<artifactId>junit-vintage-engine</artifactId>
				</exclusion>
			</exclusions>
		</dependency>
	</dependencies>

	<build>
		<plugins>
			<plugin>
				<groupId>org.springframework.boot</groupId>
				<artifactId>spring-boot-maven-plugin</artifactId>
			</plugin>
		</plugins>
	</build>

</project>
Step 3: Configure the Gmail SMTP important properties in the application.properties file.
spring.mail.host=smtp.gmail.com
spring.mail.port=587
spring.mail.username=your gmail id
spring.mail.password=your gmail password
spring.mail.properties.mail.smtp.auth=true
spring.mail.properties.mail.smtp.connectiontimeout=5000
spring.mail.properties.mail.smtp.timeout=5000
spring.mail.properties.mail.smtp.writetimeout=5000
spring.mail.properties.mail.smtp.starttls.enable=true
Step 4: Configure the main Spring Boot Application class.
In spring we have an interface called JavaMailSender which is used for sending the mail.
We can send either normal text email or HTML email with file attachements.
4.1 Sending a normal text email.
import org.springframework.mail.SimpleMailMessage;
import org.springframework.mail.javamail.JavaMailSender;

	@Autowired
    private JavaMailSender javaMailSender;

	void sendEmail() {

        SimpleMailMessage msg = new SimpleMailMessage();
        msg.setTo("email address to whom you send the mail");

        msg.setSubject("Testing from Spring Boot");
        msg.setText("Hello World \n Spring Boot Email");

        javaMailSender.send(msg);

    }
4.2 Sending a HTML email with file attachements
import org.springframework.core.io.ClassPathResource;
import org.springframework.mail.javamail.JavaMailSender;
import org.springframework.mail.javamail.MimeMessageHelper;

import javax.mail.MessagingException;
import javax.mail.internet.MimeMessage;

	void sendEmailWithAttachment() throws MessagingException, IOException {

        MimeMessage msg = javaMailSender.createMimeMessage();

        // true = multipart message
        MimeMessageHelper helper = new MimeMessageHelper(msg, true);

        helper.setTo("email address to whom you send the mail");

        helper.setSubject("Testing from Spring Boot");

        // default = text/plain
        //helper.setText("Check attachment for image!");

        // true = text/html
        helper.setText("<h1>Check attachment for image!</h1>", true);

		// hardcoded a file path
        FileSystemResource file = new FileSystemResource(new File("C:/Users\\1302143\\Desktop\\ssl4.png"));

        helper.addAttachment("ssl4.png", file);

        javaMailSender.send(msg);

    }
So our spring boot application main class will look like as shown below.
package com.pixeltrice.SendingEmail;

import java.io.File;
import java.io.IOException;

import javax.mail.MessagingException;
import javax.mail.internet.AddressException;
import javax.mail.internet.MimeMessage;

import org.springframework.beans.factory.annotation.Autowired;
import org.springframework.boot.SpringApplication;
import org.springframework.boot.autoconfigure.SpringBootApplication;
import org.springframework.core.io.ClassPathResource;
import org.springframework.core.io.FileSystemResource;
import org.springframework.mail.SimpleMailMessage;
import org.springframework.mail.javamail.JavaMailSender;
import org.springframework.mail.javamail.MimeMessageHelper;
import org.springframework.web.bind.annotation.RequestMapping;
import org.springframework.web.bind.annotation.RestController;

@SpringBootApplication
public class SendingEmailApplication {

	@Autowired
    private JavaMailSender javaMailSender;

	public static void main(String[] args) {
		SpringApplication.run(SendingEmailApplication.class, args);
	}

	void sendEmail() {

        SimpleMailMessage msg = new SimpleMailMessage();
        msg.setTo("email address to whom you send the mail");

        msg.setSubject("Testing from Spring Boot");
        msg.setText("Hello World \n Spring Boot Email");

        javaMailSender.send(msg);

    }

	void sendEmailWithAttachment() throws MessagingException, IOException {

        MimeMessage msg = javaMailSender.createMimeMessage();

        // true = multipart message
        MimeMessageHelper helper = new MimeMessageHelper(msg, true);

        helper.setTo("email address to whom you send the mail");

        helper.setSubject("Testing from Spring Boot");

        // default = text/plain
        //helper.setText("Check attachment for image!");

        // true = text/html
        helper.setText("<h1>Check attachment for image!</h1>", true);

		// hard coded a file path
        FileSystemResource file = new FileSystemResource(new File("C:/Users\\1302143\\Desktop\\ssl4.png"));

        helper.addAttachment("ssl4.png", file);

        javaMailSender.send(msg);

    }
}
Step 5: Create a Controller class as shown below.
package com.pixeltrice.SendingEmail;

import java.io.IOException;

import javax.mail.MessagingException;
import javax.mail.internet.AddressException;

import org.springframework.beans.factory.annotation.Autowired;
import org.springframework.web.bind.annotation.RequestMapping;
import org.springframework.web.bind.annotation.RestController;
@RestController
public class SendEmailController {

	@Autowired
	SendingEmailApplication sendingEmailApplication;

	@RequestMapping(value = "/sendemail")
	public String send() throws AddressException, MessagingException, IOException {
	   //sendEmail();
		sendingEmailApplication.sendEmailWithAttachment();
	   return "Email sent successfully";
	}
}
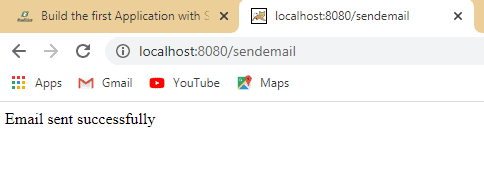
Step 6: Run the Spring Boot Application and hit the endpoint localhost:8080/sendemail. You will get a message as shown below.

Note: If you are getting any error like javax.mail.AuthenticationFailedException: 535-5.7.8 Username and Password not accepted. Then might happen either of any mentioned reason below.
- Less Secure app is not enabled on your gmail account(Turn it On).
- Two step verification might be turn on.(please do off it for testing).
Congratulations! You successfully send a mail from Spring Boot Application. You will get completed Source code from my Github account.
Summary
In this article, we have learned How to send email using Spring Boot Application via Gmail SMTP. If you have any queries or confusion, please feel free to comment on it down below. I will love to solve or fixed your queries as soon as possible.
You can also checkout my other Spring Boot Articles.
- How to develop Spring Boot Web Application using Thymeleaf
- Spring Boot Security using OAuth2 with JWT
- Deploy the Spring Boot Application on External Tomcat Server
- Run Application from Spring Boot CLI
- How to add an Interceptor in a Spring Boot Application